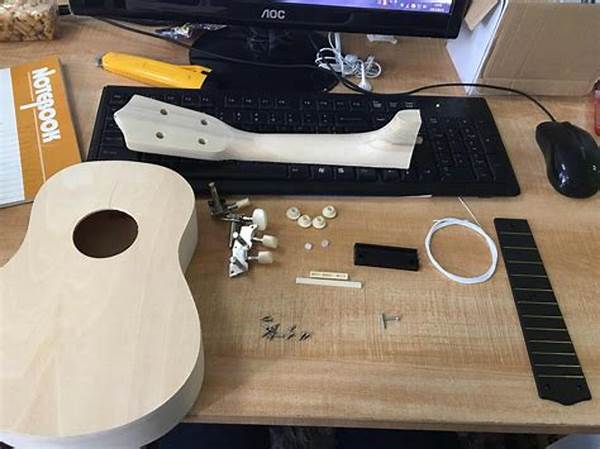
Have you ever found yourself strumming mournfully on your air ukulele, longing for the real thing, but overwhelmed by the price tag that comes with the glossy, store-bought versions? Well, get ready to swap that air-spade for the real McCoy. In this article, you’re about to embark on an exhilarating journey that blends craftsmanship with creativity, and the best part? You don’t have to break the bank to achieve a harmonious instrument build. With everyday materials and a bit of elbow grease, you can create a ukulele that perfectly mirrors your unique style and musical aspirations.
Read More : A Typical Latin American Percussion Instrument In Modern Salsa Music
Forget the days of feeling like an amateur in the world of strings. This is an exclusive invitation to don the dual hats of a luthier and musician within the comfort of your own garage. Picture the thrill on your friends’ faces as you reveal that the sweet melodies flowing through the air are produced by an instrument you built yourself. That moment of surprise mixed with envy is priceless! You’re not just crafting a music tool; you’re weaving a tale of creativity, thriftiness, and sheer genius.
The Essence of Crafting a DIY Ukulele
Assembling your own ukulele from simple materials is not just an act of creation; it’s a statement. It’s a tale that blurs the lines between economy and artistry. With a surface-level dive, constructing a ukulele might seem like a daunting task. However, diving deeper reveals the elegant simplicity lying in everyday materials that magically transform to produce resonant tunes.
Materials Required
Begin your journey with a treasure hunt around your home or a quick visit to a local craft store. The materials you’ll need include:
These ingredients form the backbone of a DIY ukulele that carves a story of its origin every time it’s strummed, creating a conversation starter and a relic of personal achievement.
Step-by-Step Assembly
1. Prepare the Body: Begin by selecting a suitable wooden box for the ukulele’s body. Cut out a hole in the center of the box to serve as the soundhole which allows vibrations to be audible.
2. Shape the Neck: Take the wooden dowel and sand it down to achieve a comfortable shape that fits snugly into the palm of your hand. Attach this to one end of the box, ensuring it’s centered and secure.
3. Fit the Tuning Pegs: Drill holes at the tapered end of the neck, installing the tuning pegs to hold your future strings.
4. String it Up: Use the fishing line or ukulele strings, attaching them from the tuning pegs down to the bridge. Ensure adequate tension for sound clarity.
Read More : Organ Musical Instrument Bridging Medieval, Baroque, And Modern Eras
5. Finishing Touches: Spend time sanding and finishing your ukulele to match your aesthetics. Paint, varnish, or leave it natural!
Benefits of a DIY Ukulele
Real-Life Success Stories
Meet Leo, a high school student who took on the challenge of crafting his own ukulele. With a few YouTube tutorials and some late-night woodworking, Leo emerged with not only a striking instrument but a keen sense of artistic pride. It’s become more than just a ukulele; it’s a testament to his creativity and resourcefulness—a boundless gift that echoes every time he strums a tune of joy or sorrow.
Why You Should Try This Too
If personalization, innovation, and music are what tickle your fancy, then stepping into the world of handcrafting your ukulele is precisely the adventure awaiting you. This venture promises not only an escape from the monotonous daily grind but also a gateway to cherished memories bonded with your newly crafted ukulele.
Rounding Up the DIY Ukulele Journey
The voyage of creating your own ukulele from simple materials is one of innovation, personal growth, and musical delight. By embracing this do-it-yourself endeavor, you gain more than an instrument; you gain a chapter of achievement written by your very hands. The limited cost, coupled with the unlimited potential for creativity, opens a new dimension to musical expression without financial strain.
This isn’t just a tutorial; it’s an introductory passage into a world where every note strummed resonates with the effort and craftsmanship of its maker. It’s an art form, a bespoke piece of musical equipment that tells a story of economic resources adeptly transformed into cultural and artistic richness.
Tell Your Story
Unleash the artist within you, embrace the process, and in no time, create a melody that writes your own story, a musical journey that sings of your ingenuity and flair for creativity. Don’t let this opportunity slip away—begin your ukulele assembly adventure today!
